
We went in for a bottom job, and to complete the electronics install with a new speed/depth/temp transducer and the forward-looking sonar transducer, but ‘scope-creep’ is inevitable.
Here is a summary of what the almost three weeks out of the water entailed:
1. Old Transducer Removal:
Extracted the old Raymarine depth transducer from the bow (stem) of the boat. This left us a hole we could re-use for installing the new tri-data, speed, depth, temperature sensor.
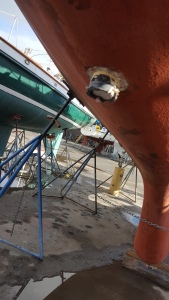
Took out the old speed log. This hole could not be re-used for the forward looking sonar. The hole was at the wrong angle through the hull and was too close to the internal bulkheads to accommodate the fairing block required for the sonar.
2. Filling in the 2 inch hole in the boat
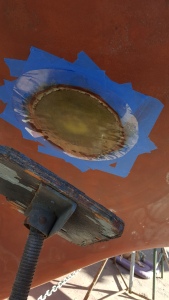
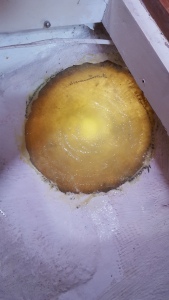
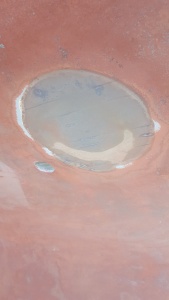
A slightly alarming job requiring working at a 10 inch circular section of the hull (4″ all around the 2″ hole) and creating a chamfer on the inside and the outside of the hull, meeting at a point at the edge of the hole. This involved attacking the hull with the angle grinder, somewhat alarming, and given the hull is almost one inch thick and solid at this point, that’s alot of grinding!
Filling the hole involved glassing in ever decreasing rounds of mat (starting with the largest closest to the chamfered edge) until the chamfer was filled, working first outside, and then inside. Given the thickness of the hull, a total of 24 layers, plus some thickened epoxy were required at the center.
3. Preparing the bottom for painting
This mostly involved a couple of days of sanding as there was quite the build-up of old paint. We expected to find some blisters, but there was really nothing of any significance to report (that’s good news!) and other than dremelling out a few imperfections and filling with thickened epoxy, the hull looks to be in pretty good shape.


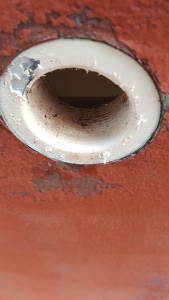
4. Installing the new Tri-Data (speed, depth, temperature) Transducer.
A pretty simple job involving bonding the transducer housing to the hull with a generous quantity of 3M 4200.
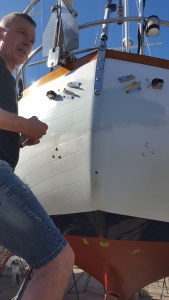
5. Installing the B&G Forward Looking Sonar Transducer and Fairing
Probably the part of the whole bunch of work we were most concerned about, we actually considered not installing it and seeing if we could return it. We also considered having the yard install it, but given they were able to let me use their band saw, and eventually, after much searching found a 2″ hole saw that would take a long pilot drill, to accommodate the 28 degree slant of the hull, we took on the project ourselves.
The challenge here is to cut the fairing block to (exactly) the right shape such that it will sit against the hull, presenting the transducer perpendicular to the surface of the water. That is difficult enough, but once you consider the transducer housing will travel through a section of fairing block on the outside of the hull, then through the inch of hull thickness, and then through the remainder of the fairing block inside the hull, and these three holes (tubes) need to align perfectly, it could be tricky. Long story short … we got it fitted, and its perfect side-to-side, and tips up about 3 degrees front-to-back. I’ll take it!
The cutting and dry-fitting of this took a whole day, involving a considerable amount of looking, thinking, holding a bit in place, thinking about it some more, taking a measurement in case it changed since it was last measured, thinking about that, etc. etc. Measure 42 times, cut once!


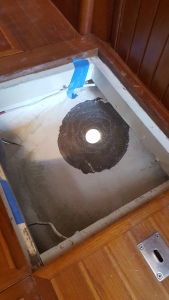
6. Replacing the cockpit scupper through-hull
Having the boat out of the water gave us the opportunity to test the through-hulls. The handle on the starboard cockpit scupper turned freely, but it was only when we went to lubricate the ball valve (from the outside) that it was clear that the handle didn’t actually work the valve, and the through-hull could not be closed. time for a new one. these are BIG 2″ bronze fittings (expensive!).
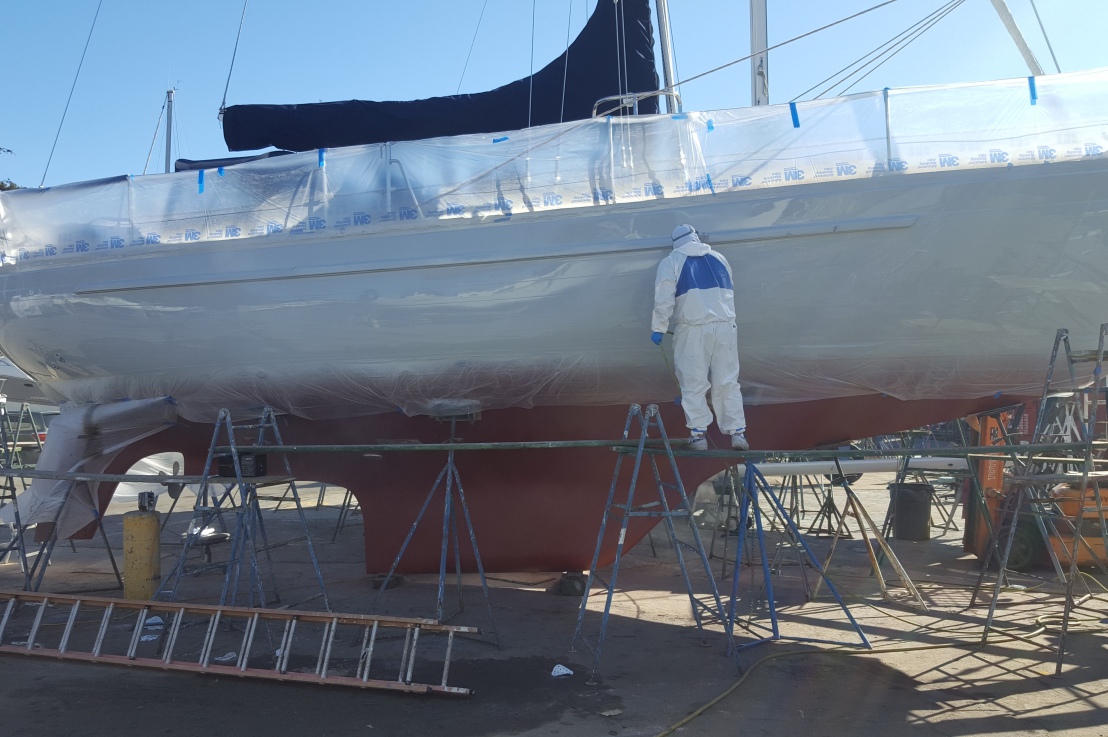
7. Painting the bottom
As it says … a roller, some paint, two generous coats. Upon the advice of the Berkeley Marine Center, we used the Sea Hawk Cukote bottom paint – it is a relatively hard ablative paint.


SHOULD WE POLISH THE HULL?
So, this is where the scope creep set in. The hull on Boundless was well oxidized, and there were a few areas of the hull that had seen some minor (surface) repairs by someone that did a good job, other than they did not match the color very well and the repaired areas were quite visible (both sides, on the bow, and quite visible on the transom). I experimented before with polishing the more oxidized (unrepaired, not painted) sections of the hull, but this did not help, and the prospect of working on the polish job, just to still have the boat look sub-par because of the repair jobs was not an attractive option. Meanwhile … an older small boat in the yard had received a really nice new Awlgrip paint job, and clearly, the painter knew what he was doing. After inquiring and discussing with BMC the prospect of our doing all the intial prep work, and have the painter come in for the final finishing and paint, it was decided. Boundless was getting a hull painting. A bit of research and we opted for Awlcraft 2000 paint (more repairable that Awlgrip), and we went with the same color scheme, but slightly darker grey (Awlcraft ‘Light Grey’), and a darker blue (‘Flag Blue’).
8. Hull Prep
2-days of sanding of the hull, a bunch of masking, and the boat was ready for paint:


9. Painting
Primer:


Grey:


… and with the finished blue to the boot-stripe and toprail:


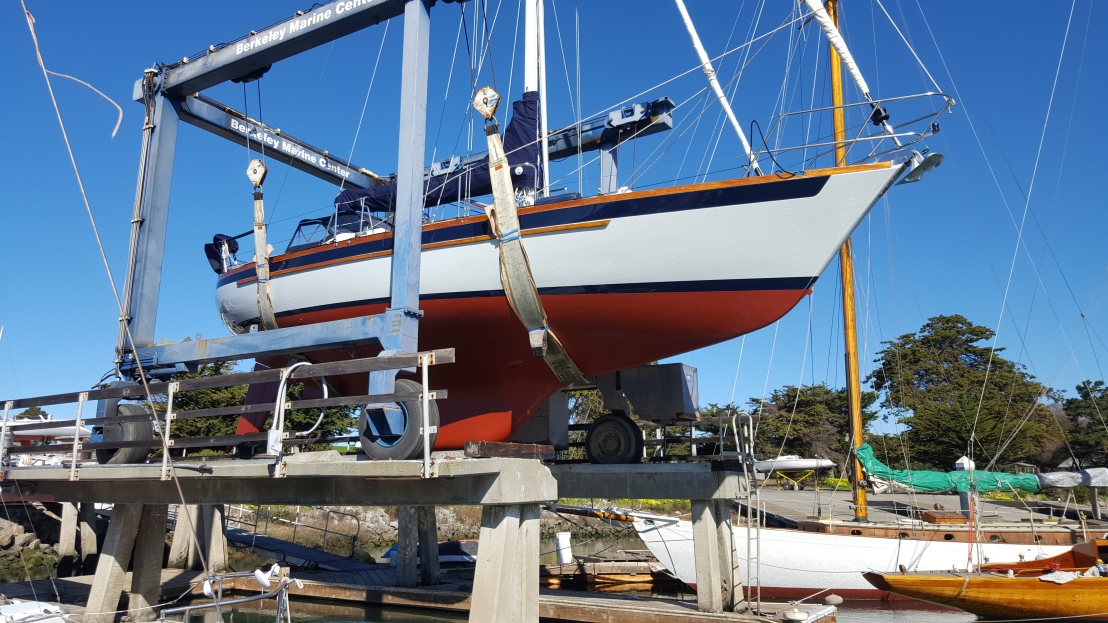
and finally splashing, after being out of the water for 19 days:

Great post, looks like lots of work! I contemplated painted my hill due to some imperfections in it a few years back but ultimately decided they were good battle scars haha!
LikeLike
It was a fair amount of work but so worth it to us!
LikeLike