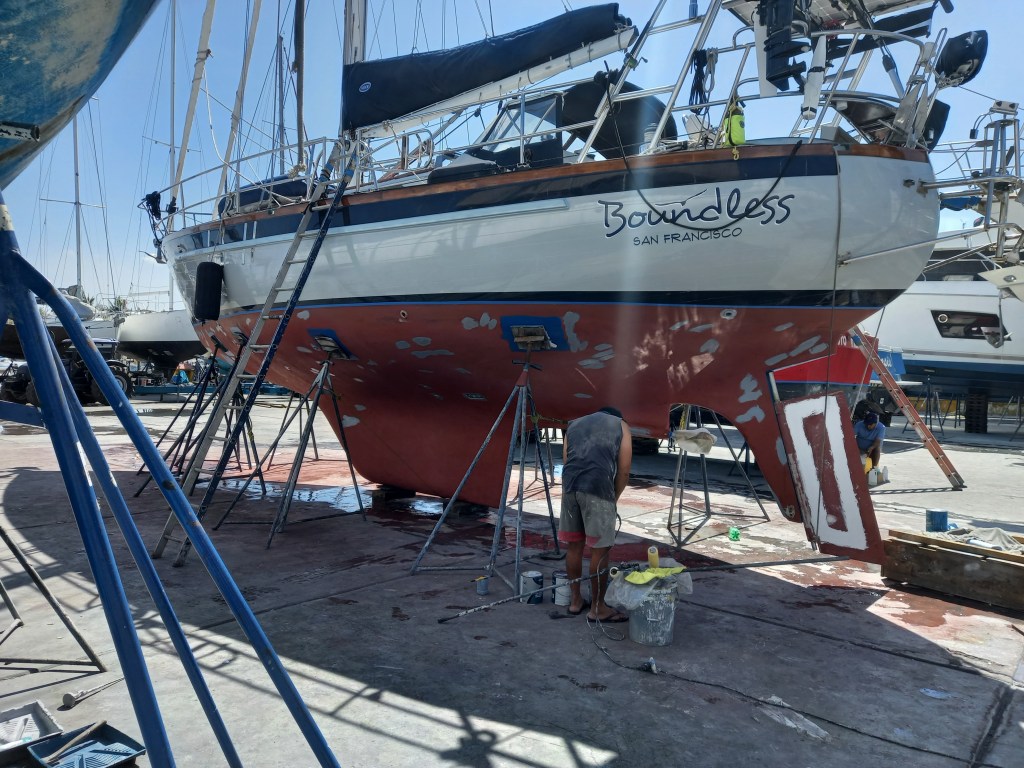
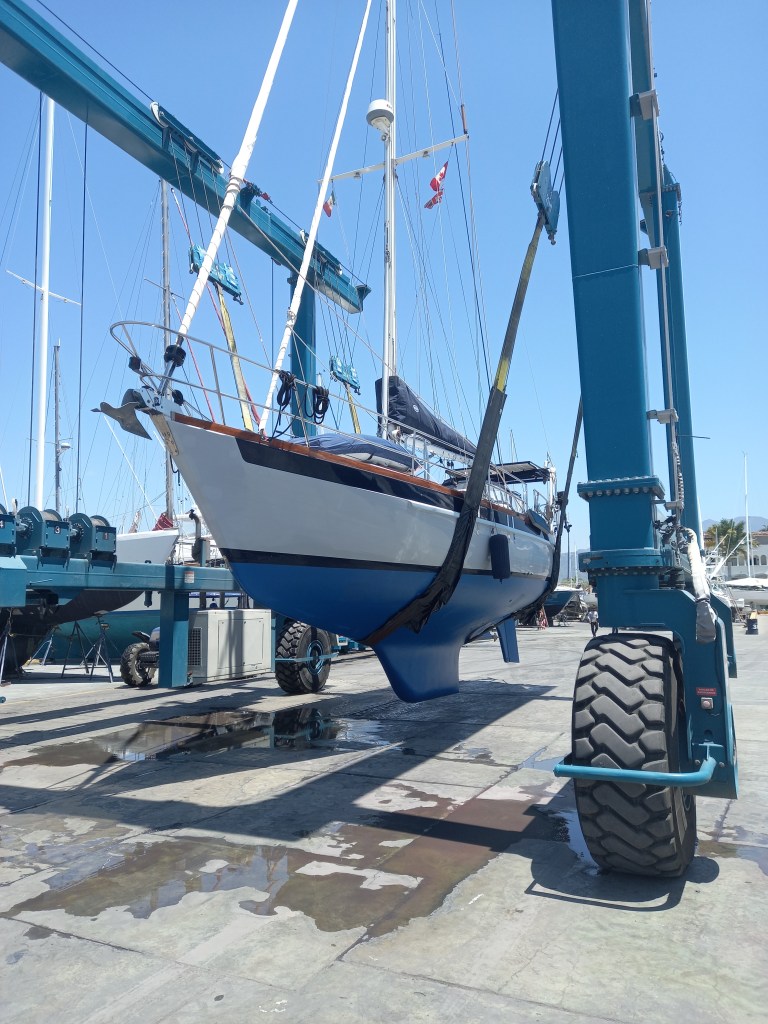
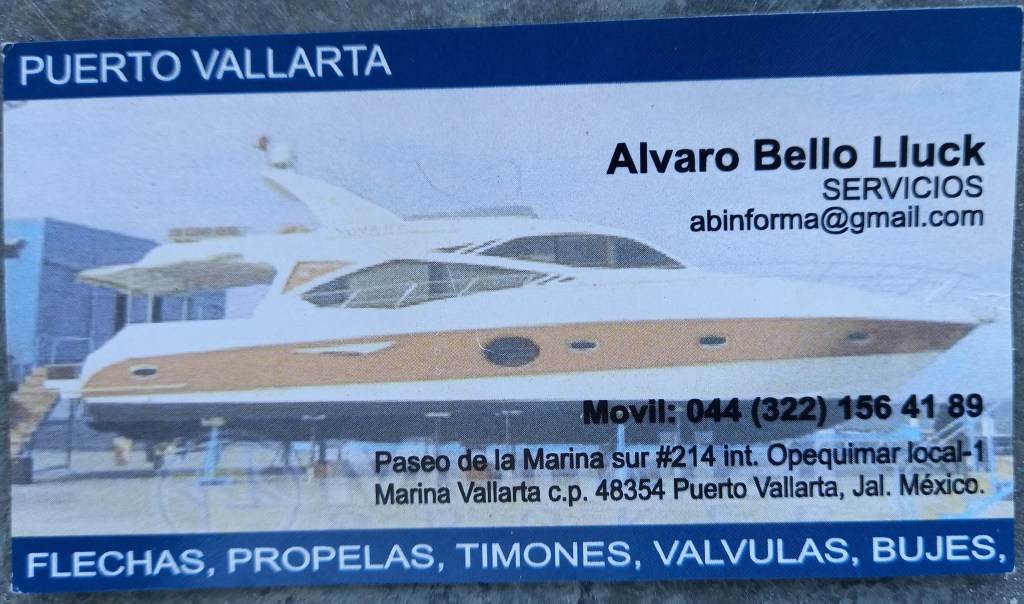
With Colin committed to going back to work for 6 weeks while we were in Paradise Village in Puerto Vallarta, it was a good opportunity to do a couple of projects. Of course, this started out as the plan to just get a ‘bottom job’ but we were incredibly fortunate to enlist the help of Alvaro Bello for the paint job, to then find out he was an expert in a whole bunch of things, and also operated a sophisticated machine shop. As a result, the ‘bottom job’ turned into nearly two weeks on the hard, and instead of the $600 quoted for the painting (we supply paint), we ended up spending $2,200 which, given the work Alvaro and his team did for us, was an absolute steal.
Rudder Bearings
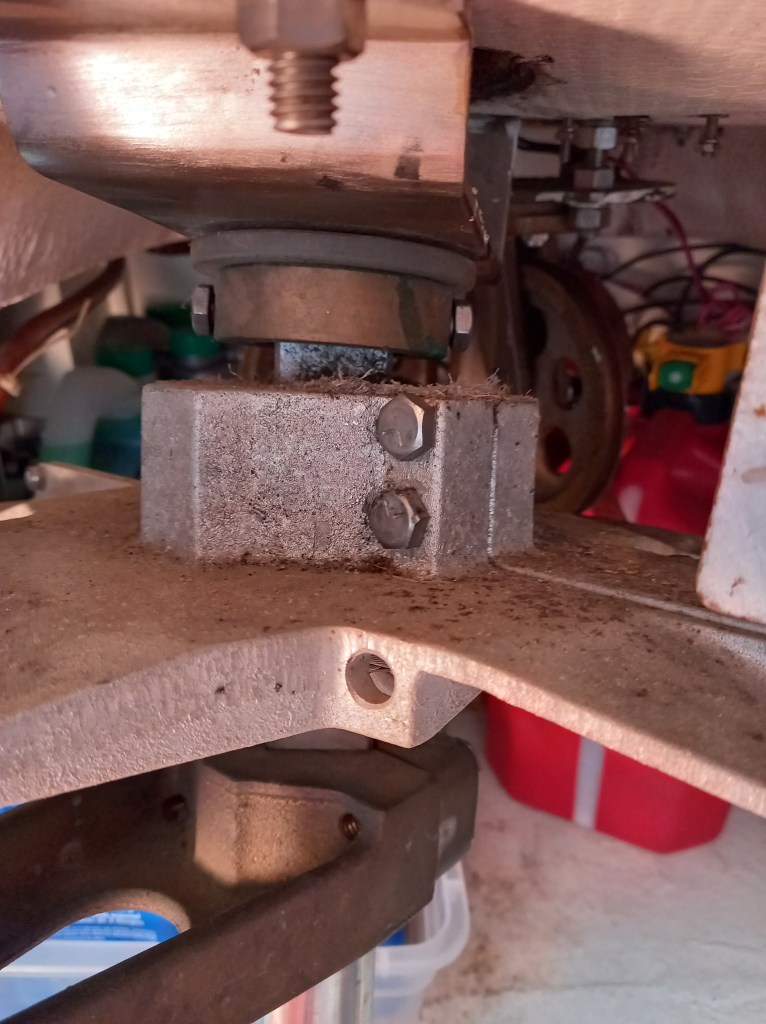
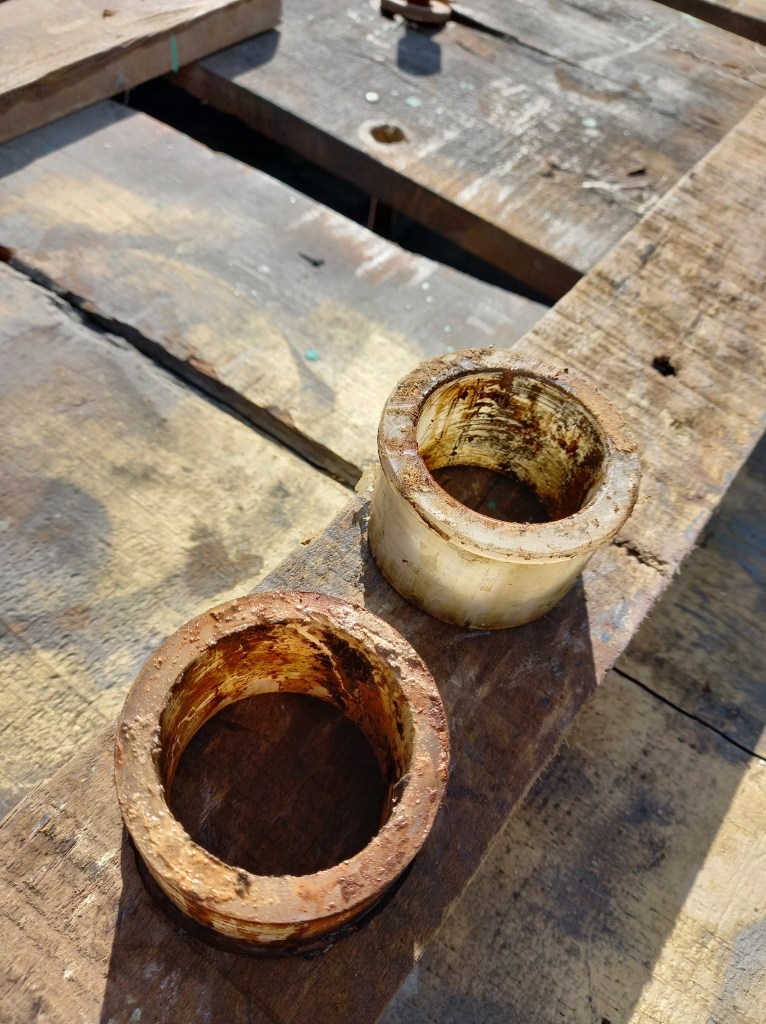
In some fairly sporty weather crossing from Baja California to Banderas Bay, we had noticed what we thought might be some play in the rudder. This was confirmed when removing the cover for the emergency tiller and seeing some excess movement in the top of the rudder post, with a top bearing moving slightly in its seat, clearly worn.
We were concerned about how we would get replacement bearings for our 1984 Taiwan built boat, but with Alvaro and his machine shop at our disposal this was not an issue. Alvaro knew the correct material (Delron) to use, and having removed the rudder, which involved dropping the ‘shoe’ at the base of the skeg, the old bearings were removed and Alvaro came up with an improved set of bearings, included a substantially longer primary bearing located at the top of the rudder blade where the shaft enters the hull.
We were conscious that this was probably the only critical boat system that we had not fully investigated before leaving in 2019, and it was certainly great piece of mind to have the rudder removed and the bearings upgraded.

Rudder Rebuild
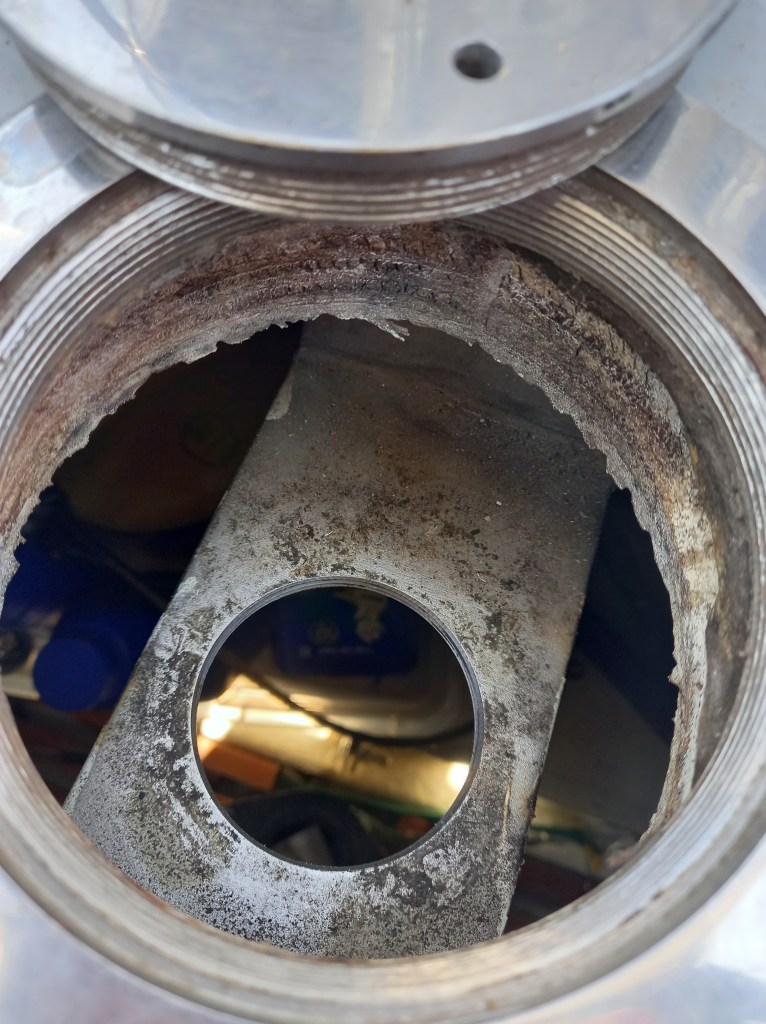
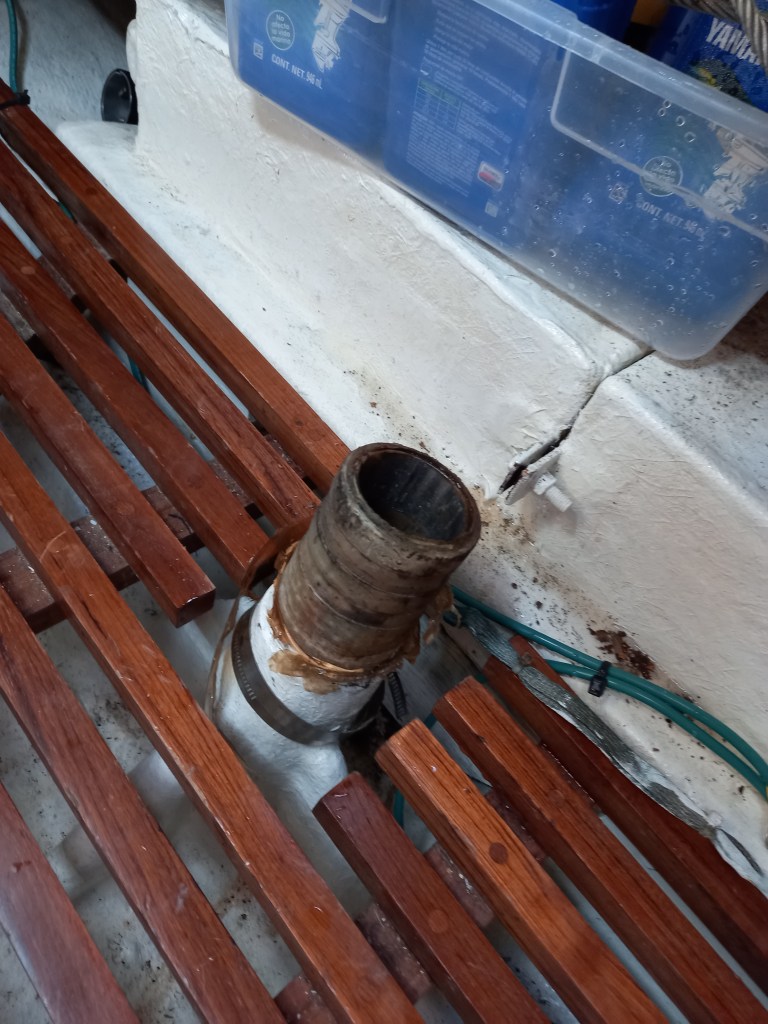
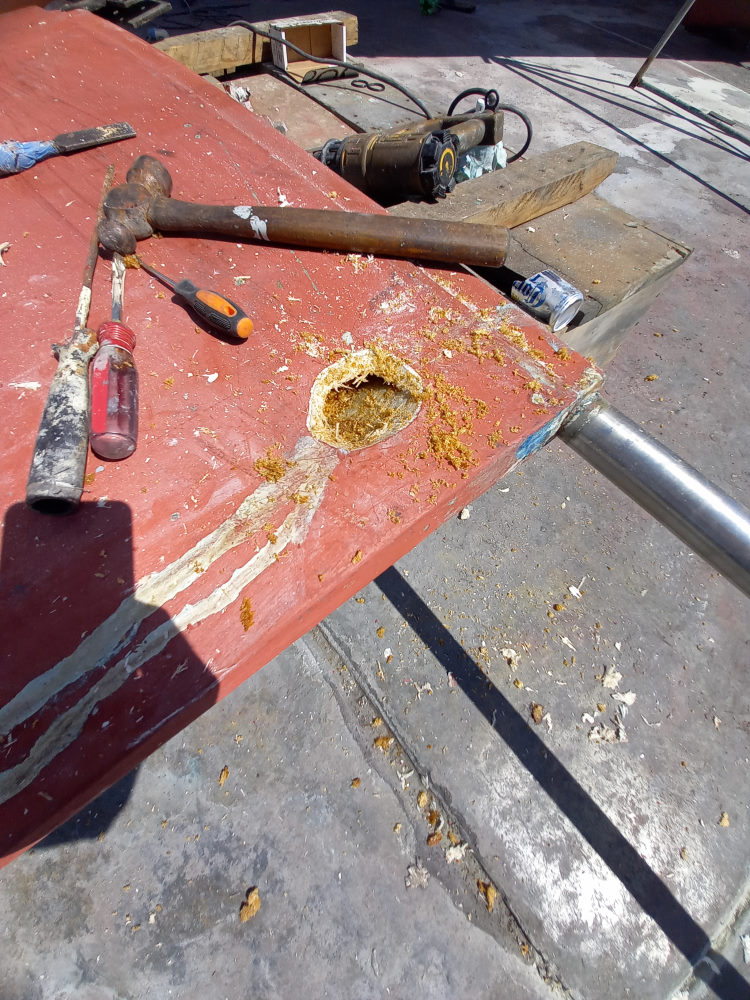
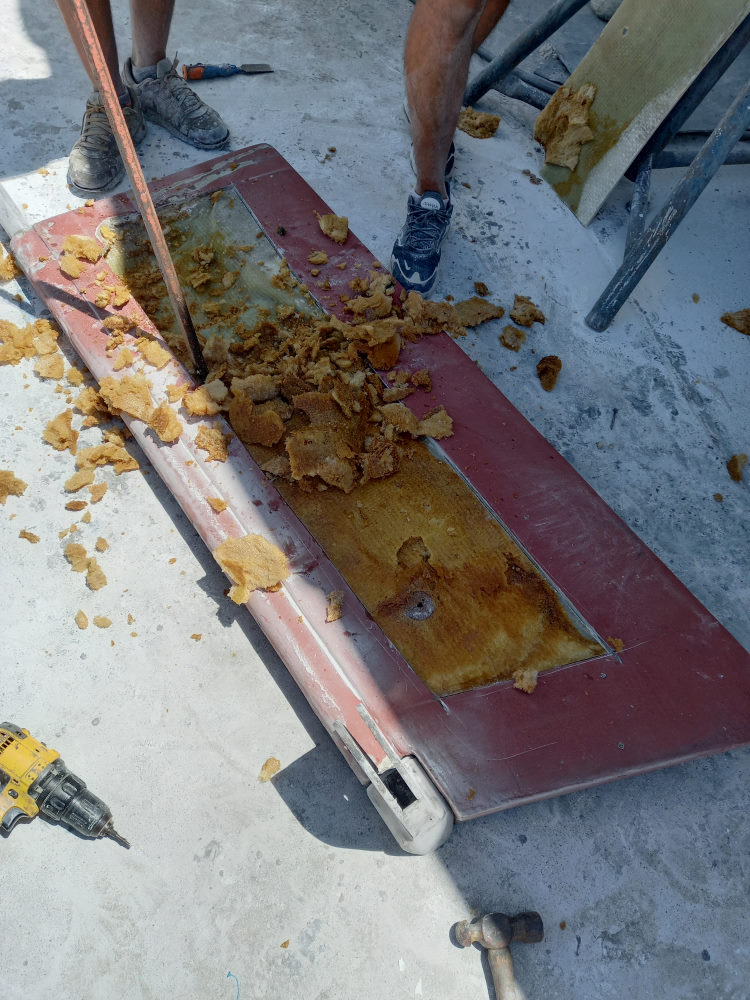
With the rudder off for the bearing replacement, it was evident there was some weeping coming from inside the rudder. It appeared the rudder was likely full of water, and this created a concern that the structural armature inside the rudder may be compromised. Time to take a look!
With the rudder cut open and the foam core exposed it was clear that the water ingress was isolated only to the foam and the armature which is glassed into one side of the rudder, was all in great shape.
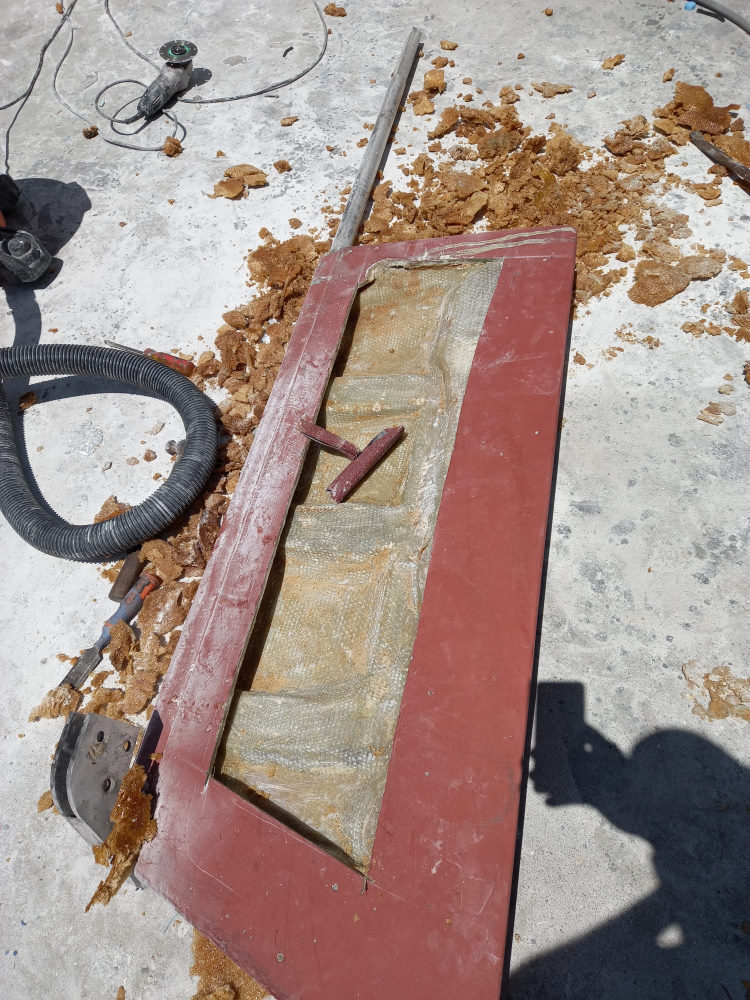
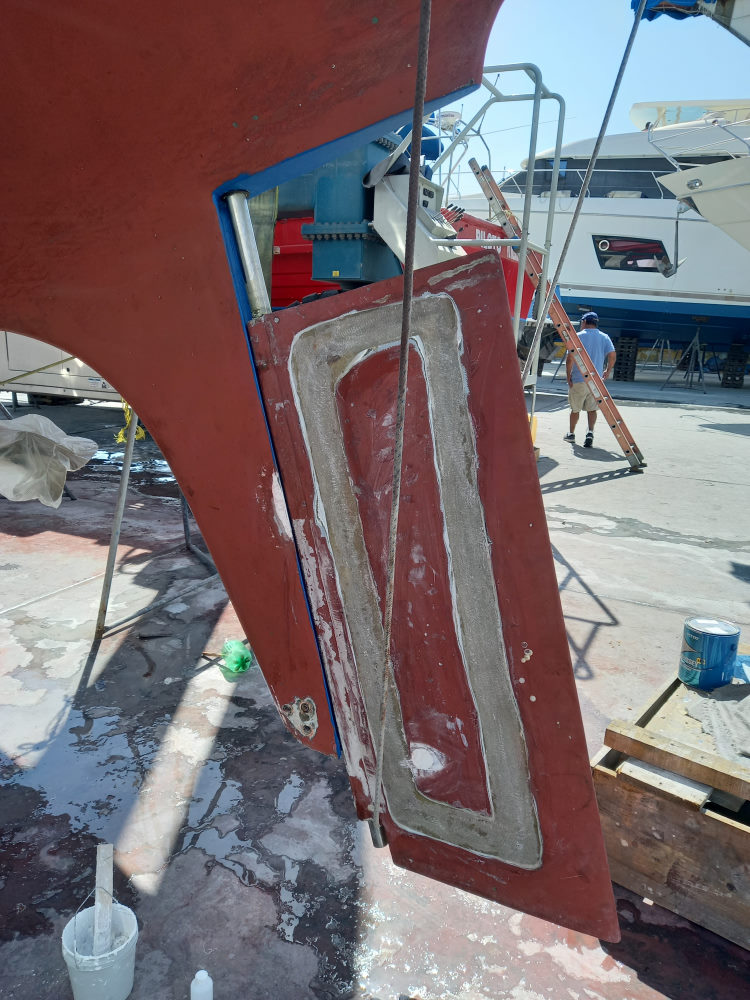
The foam was replaced and the removed section was glassed back into place and then faired ready for priming and painting.
The whole job was completed in about 36 hours from when we decided to do it, and the cost was $365. You can’t beat that!

Engine Alignment
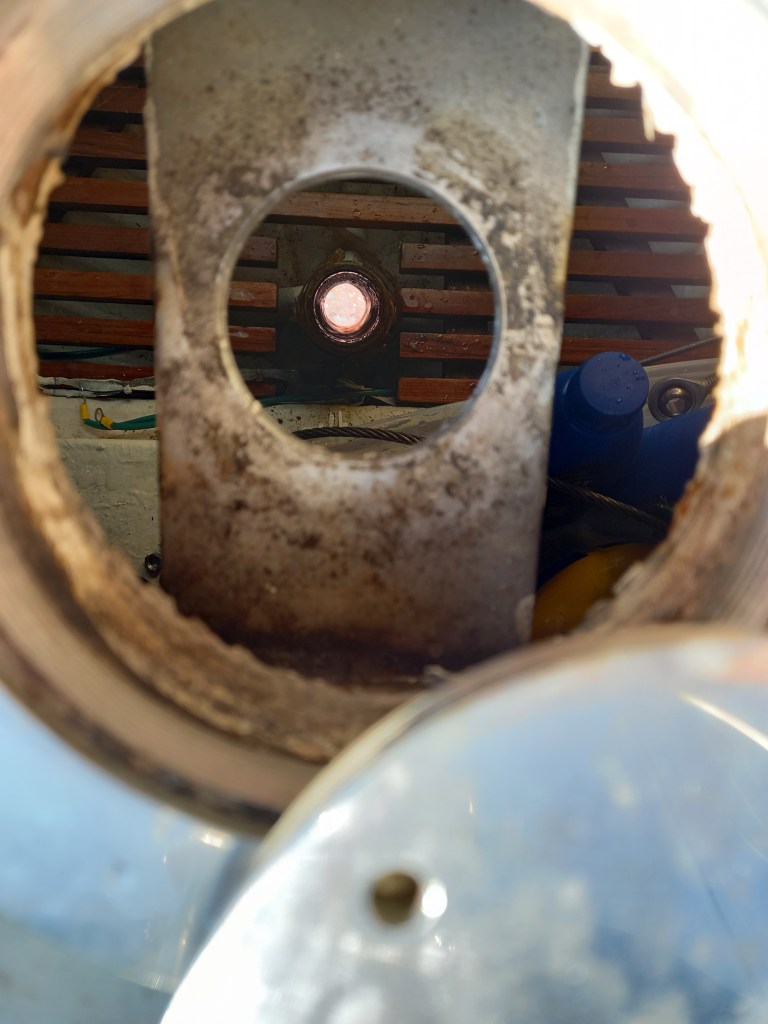
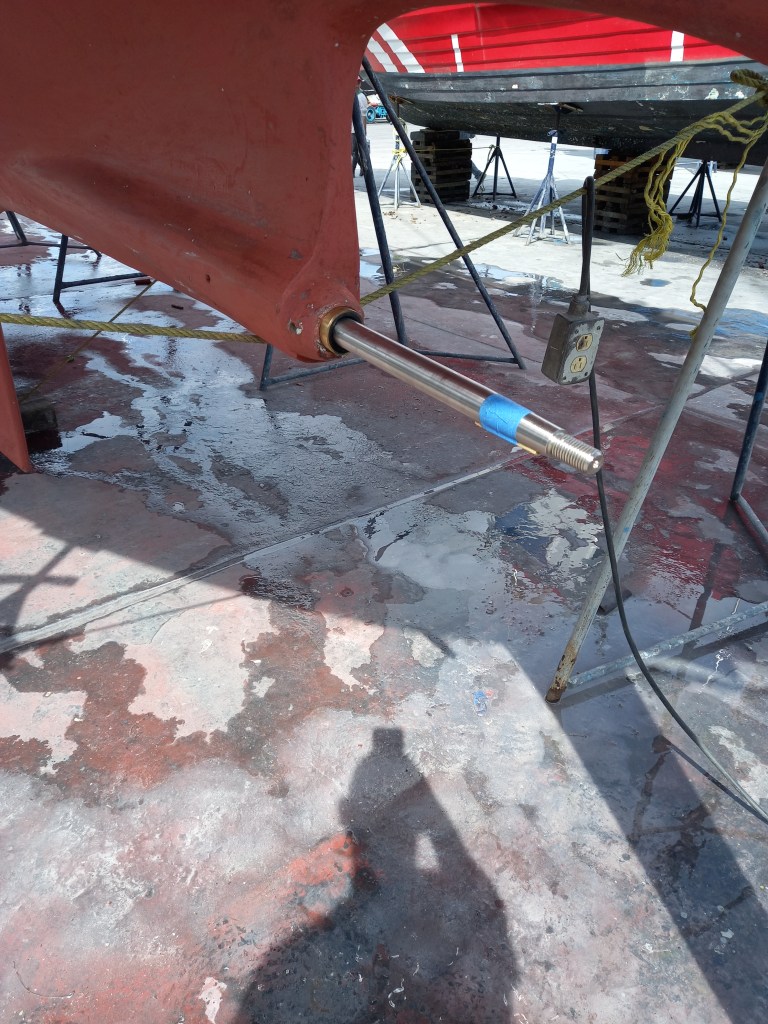
An issue that had plagued us since the install of the new engine was a slight ‘knocking’ or vibration noise that we experienced when running the engine at higher RPM’s. We looked into this when we first discovered it after the run-in period while we were still in the San Francisco Bay, and, given that the propeller was replaced at pretty much the same time as the motor, the we had a few theories about the cause. One of the most prevalent theories was that the shaft had not been cut to the correct length at the time of the install (despite having the job done at KKMI, one of the premier yards in the area), and that was creating some flexing in the shaft. We had both the engine installer, Hirsch, and KKMI look at the issue but neither had any ideas, in fact KKMI were unable (didn’t know how) to remove the Gori prop after a few hours trying despite them having had put it on a few months earlier, and we left the Bay, off on our adventure, with the problem unresolved.
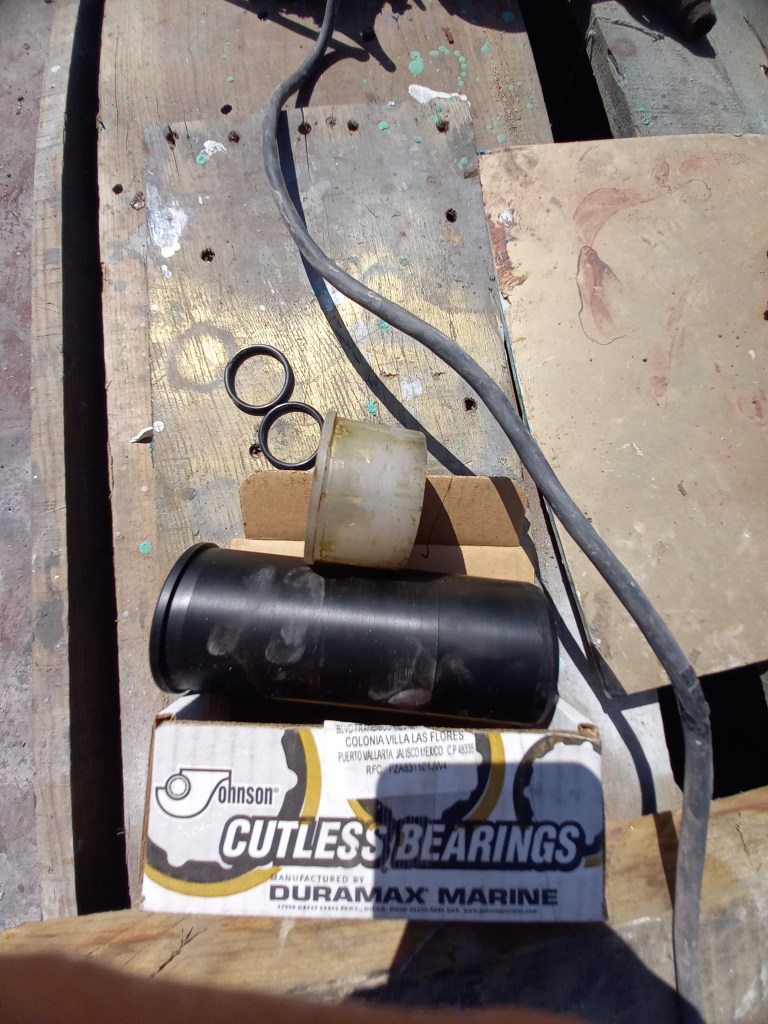
While planning to put the boat into the Opequimar yard in Puerto Vallarta, I went to see Alvaro Bello, the contractor at the yard, and noticed some huge cutlass bearings behind his desk, so thought to chat with him about our lingering issue. He suggested we go for a quick test drive in the boat prior to the haul-out, and just five minutes into that, he told me to turn around; he knew exactly what to do.
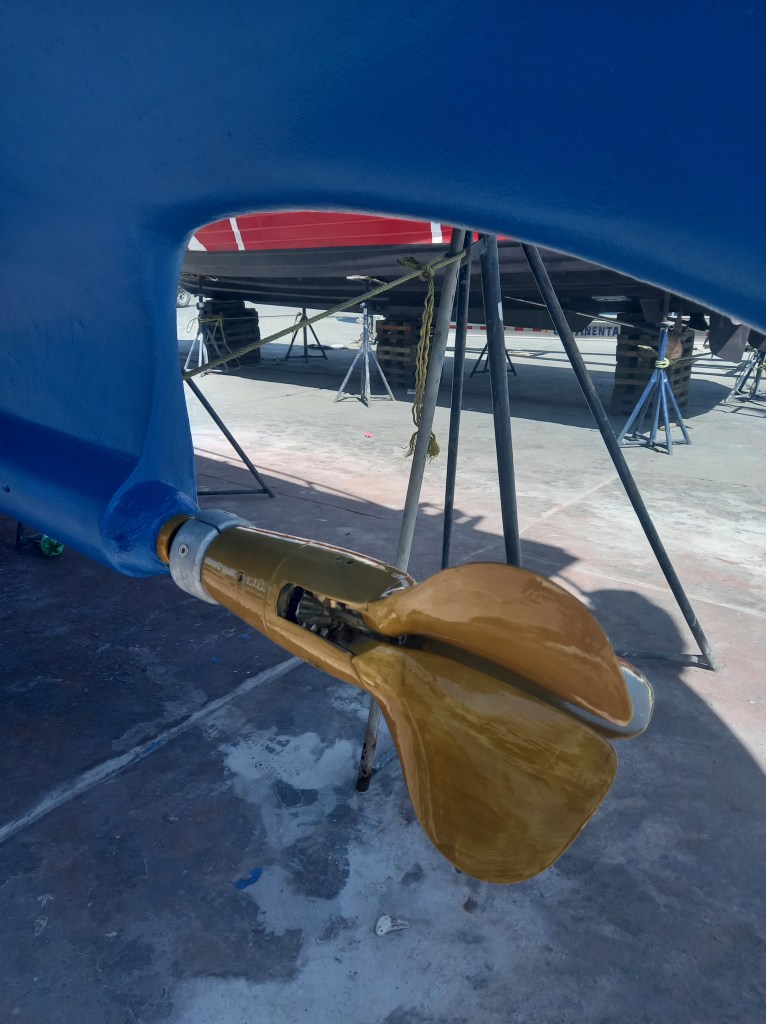
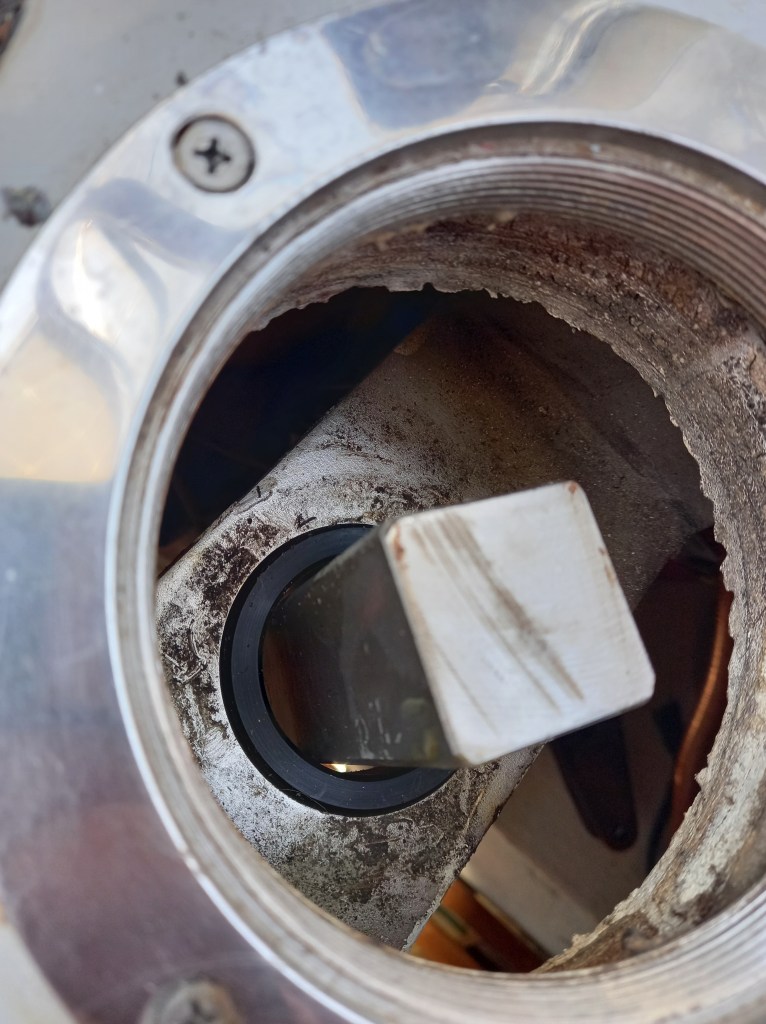
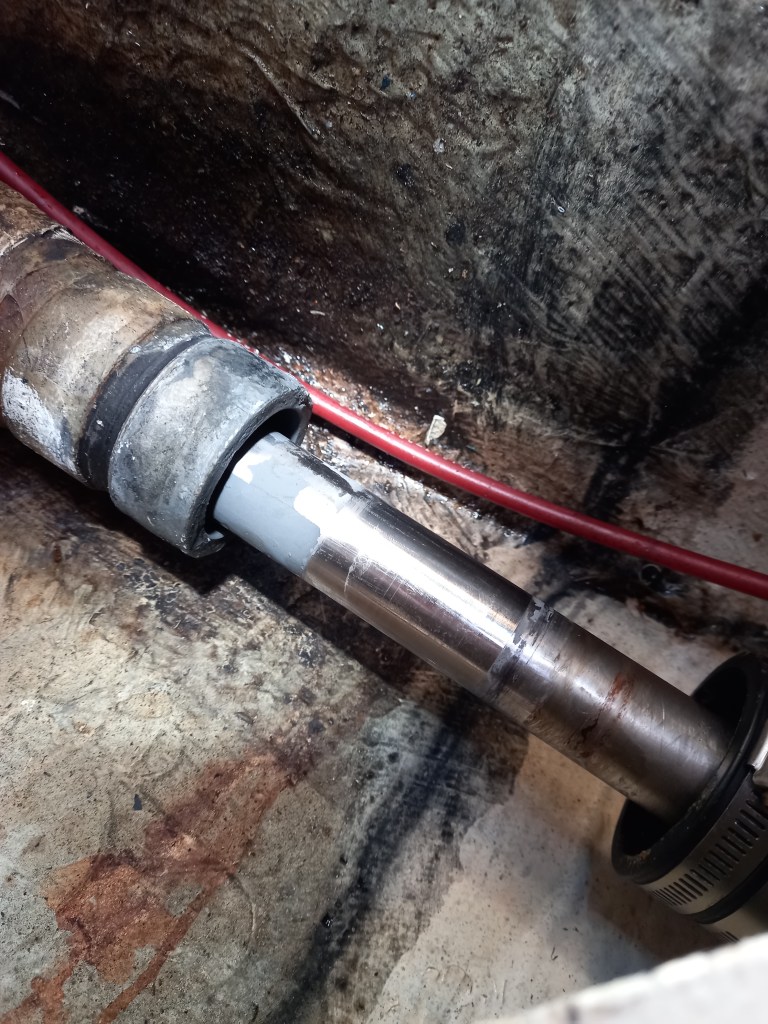
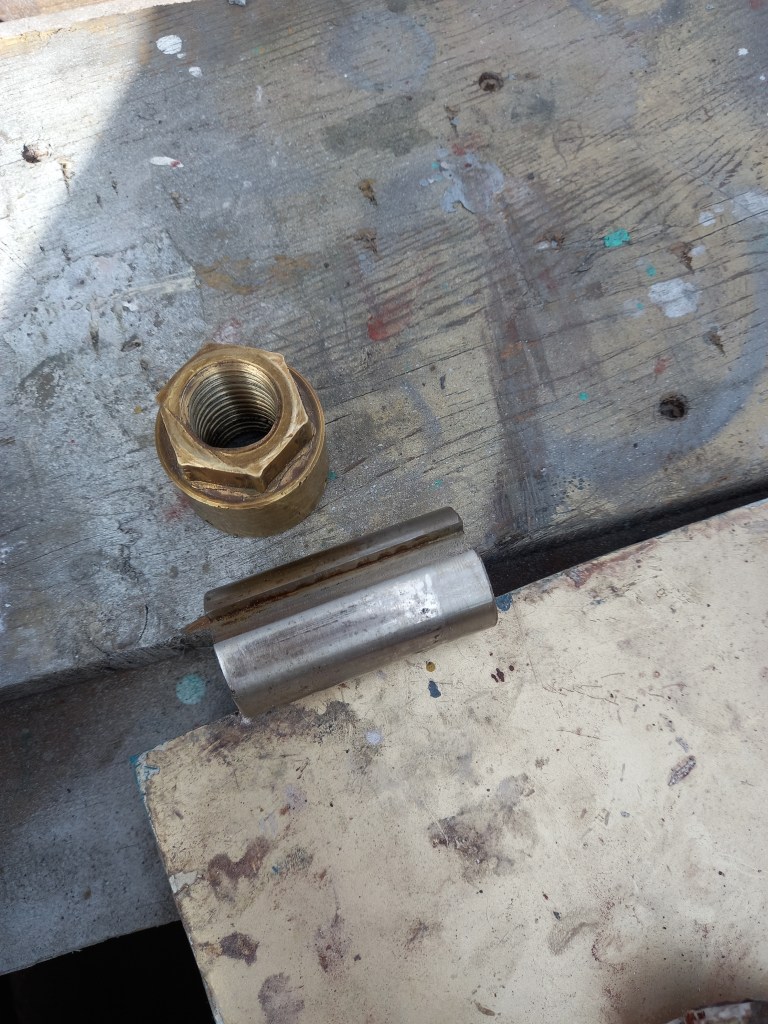
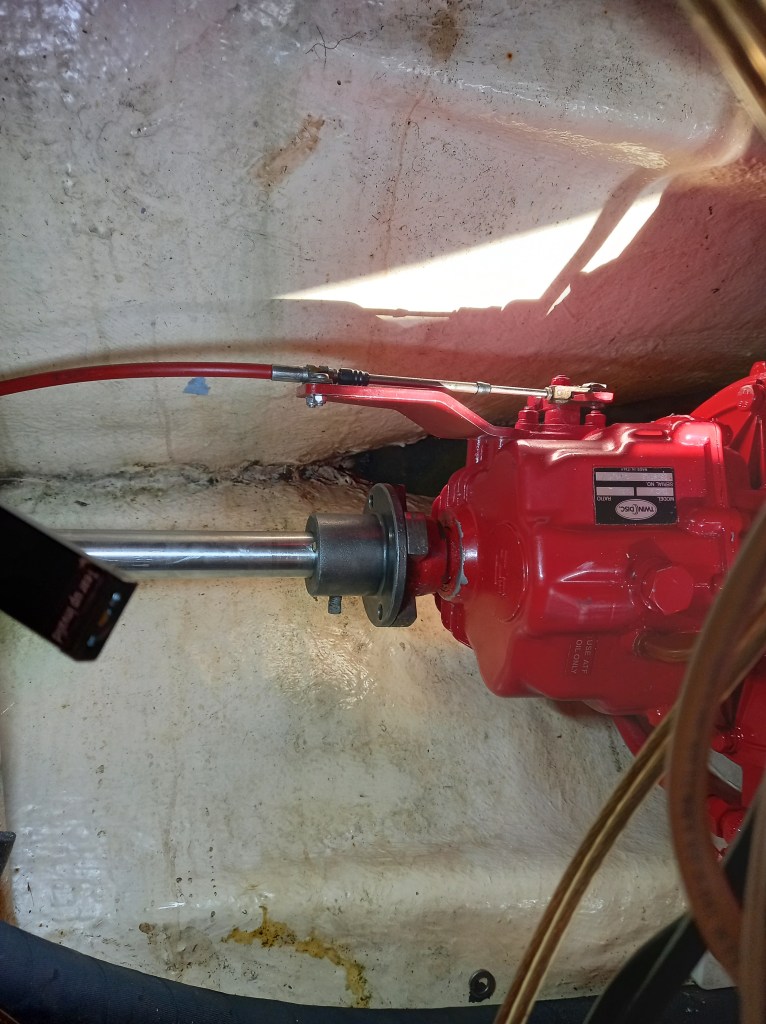
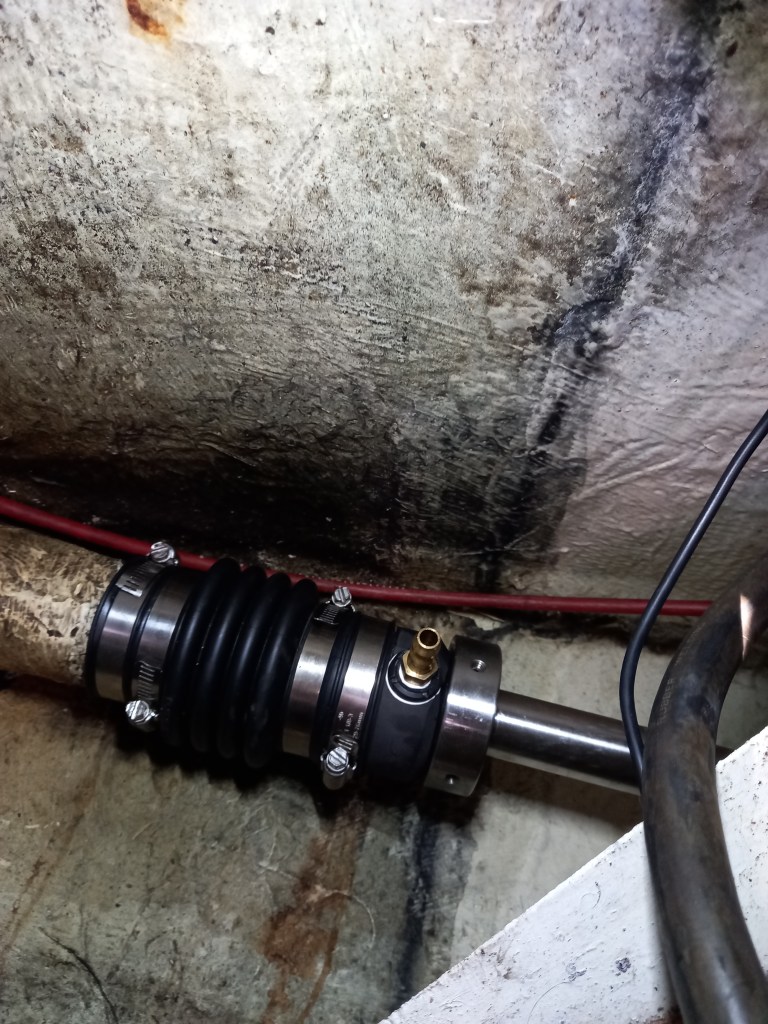
As it turns out, the shaft is quite long, about 6 feet, and it travels through a long stern tube that has a cutlass bearing at the outer end and the PSS dripless seal at the inboard end. The engine, although perfectly aligned with the shaft, was not perfectly aligned in the stern tube, and therefore Alvaro’s solution was to add a second cutlass bearing at the inboard end to better support the shaft perfectly within the stern tube. In addition, Alvaro took the shaft to check back to his shop, and also removed about 3/4″ of length. We also took the opportunity to replace the outer cutlass bearing.

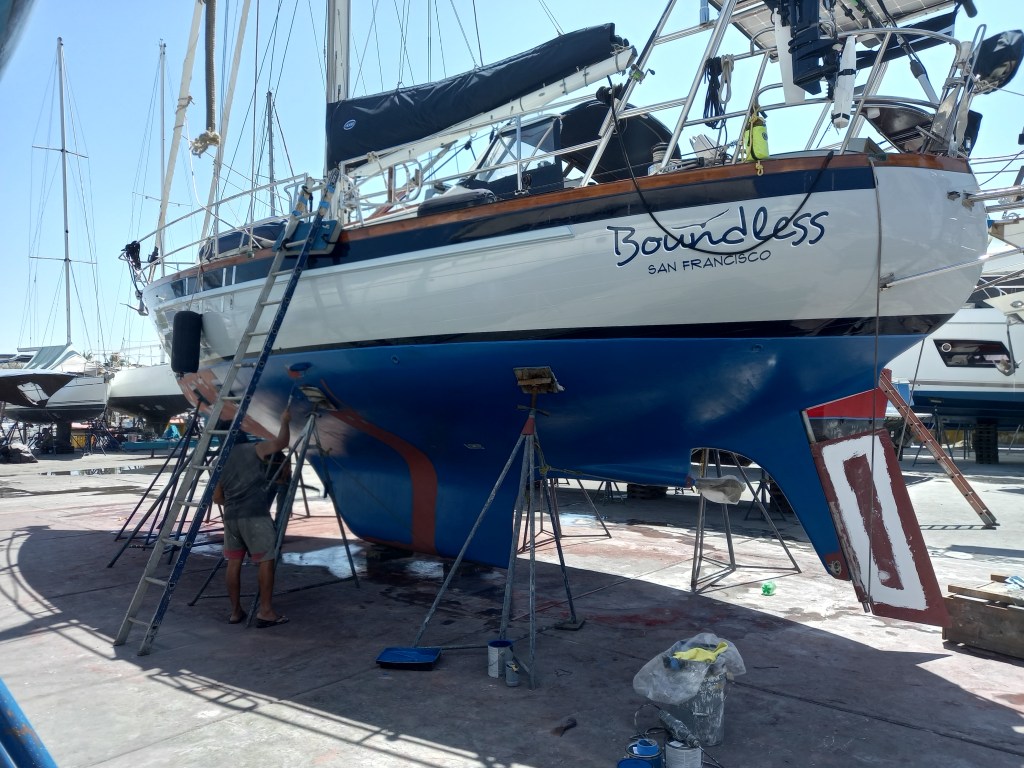
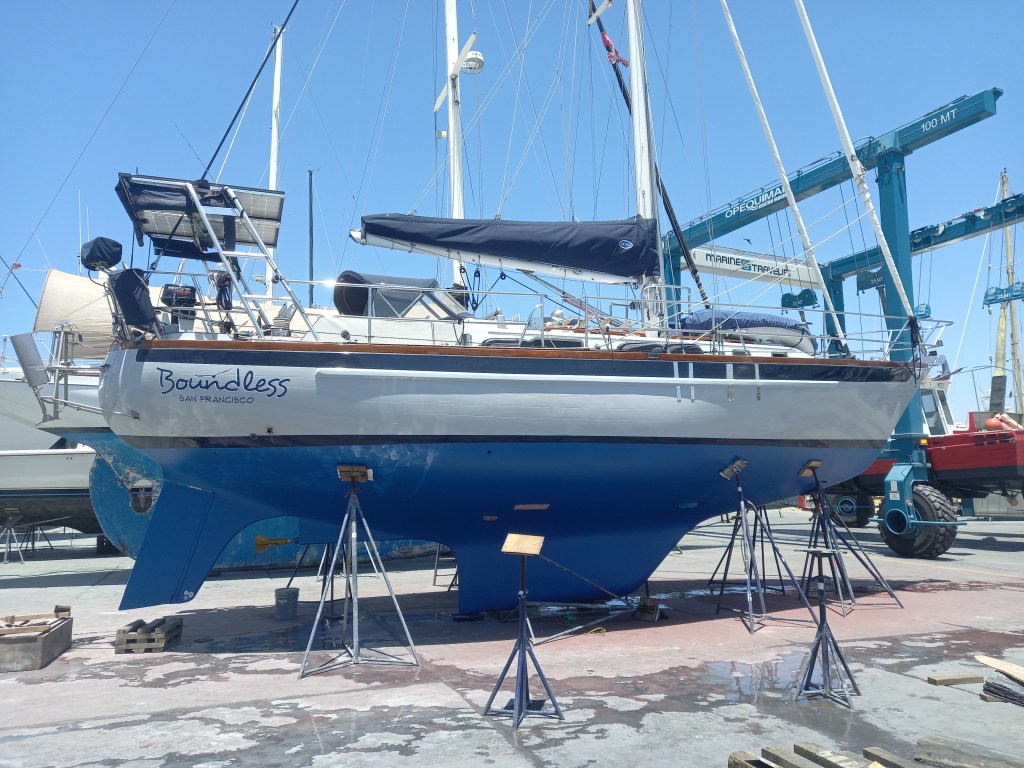
Bottom Paint Job
Yes, what we originally came for. The Seahawk Cu-kote we put on in January 2018 had done us well, but it was time for some fresh paint. Looking at options that may be more tropical water appropriate, we went with Pettit Odyssey, in blue. We also replaced the Propspeed on the Gori.