Another one of those projects that seemed simple enough, but turned out to be twice as expensive and take five times as long as we thought. The old system was ?? years old and was just a bunch of spaghetti in the propane locker. After one of the tanks was hissing after being filled (and swiftly removed from the area), it seemed like the appropriate time to tackle the whole job.
The system had two 10lb aluminum tanks, and fed two separate systems (two solenoids); one for the galley stove, and a second for the cabin heater and the barbecue.
Process:
- Remove all the old connections, solenoids, wiring and hoses in the propane locker
- Level the base of the locker with a bunch of resin to attempt to get rid of the potential water (or propane?) pool in the base of the locker due to the poor draining angle of the locker floor relative to the drain hole.
- Paint locker.
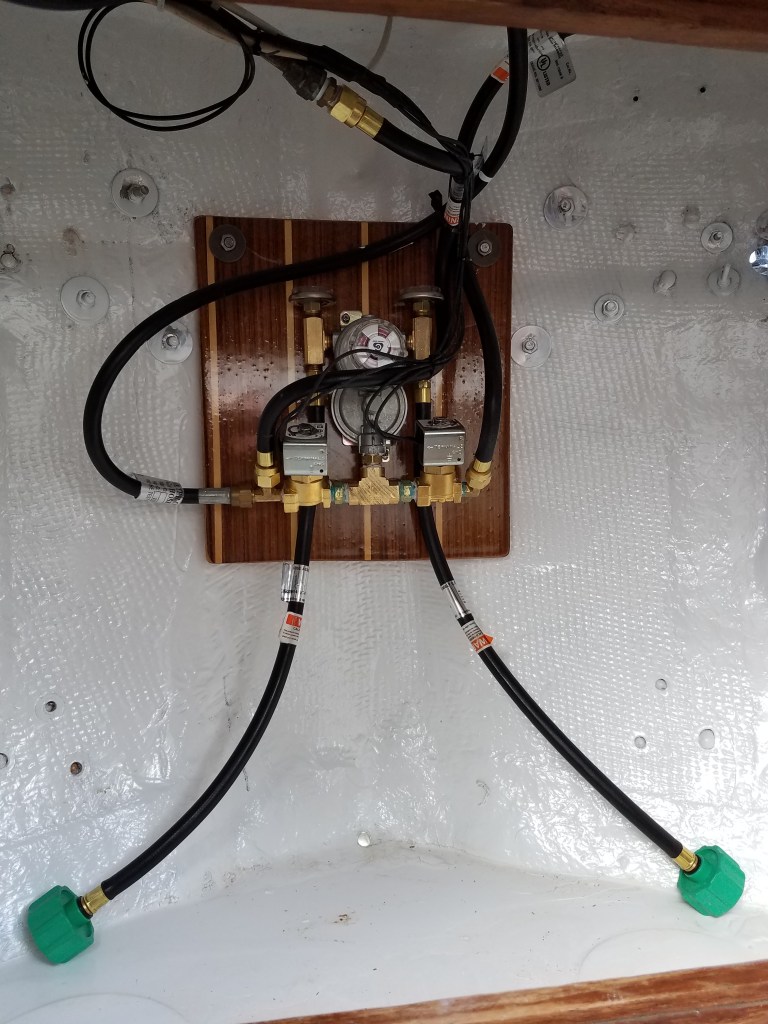
- Build a new regulator/solenoid manifold from many tiny (apparently odd-sized) connections, and don’t over-tighten the brass fittings, they will collapse! Oh, and work out which ones need sealing compound, and which (flare fittings) do not.
- Run a new line to the galley stove, replacing the ?? years old one. (We left the existing copper tubing to the cabin heater).
- Install new 16lb fibreglass tanks and test fittings.
- Boil some water on the stove for tea
Result: We now have a system we are happier with, and also has 34lbs of propane (versus 20), which is probably 5-6 months of cruising supply.