

Well, we’d been talking about this one for a good year or so, and finally ‘bit the bullet’ and did so in a pretty big way, rejecting the base (and likely perfectly fine) model for the upgrade ‘Cape Horn 330 Extreme’. Of note here is that we have absolutely no intention of going anywhere near Cape Horn, but even if we aren’t up to the task, we’ll now we have a watermaker named after the ‘Everest of the Sea’. And to boot … we added the z-ion option, so we are indeed well equipped for fresh water.
Actually, we liked the 15 gallon per hour production capacity of the Cape Horn, and the z-ion add-on allows us to leave the entire system unused for up to 30 days without ‘pickling’.
Of course, buying something is generally the easy part, it’s when the huge and heavy box arrives and you unpack it to discover something much larger and heavier than expected when the real decisions need to be made. Where to put it? How much of our boat are we going to need to cut up to get it fitted? Do we add more thru-hulls to further enhance the swiss-cheese character of the boat?
So, here is how it goes …
- Given our future access to fresh water (and readily available seawater source – by bucket), we decided to use the intake thru-hull for the seawater footpump operated sink faucet as the intake for the watermaker.
- This left us with a nice brass outlet at the sink which now is where the newly made fresh water comes while we test it before diverting it to the tanks.
- We did need a new ‘exit’ thru-hull, and given the ideal position is above the waterline, this was one we could do at the dock … although its always an odd experience taking a hole saw and drilling from the inside of the boat through the hull, hoping the measuring was correct, and the result is indeed above the waterline.
- We installed the two pump units, and the big (40″ long) membrane, plus the accumulator tank and the z-ion unit, all underneath the port side settee – a big bit of real estate luxury, but we figure we have a lot of storage elsewhere. The flow and pressure panel goes at the base of the settee.
- Working out how to mount the two pumps was a challenge – and because of the variety of plumbing , some coming into the to of the pumps and some exiting the bottom, as well as the requirement to be able to change the filters, we made fairly large holes in the floor of the under-settee storage, so the pumps could be mounted ‘hanging down’ into the bilge below. Yes – there was some fine-galling to get the install right.
- With the boat hacked up then painted, and the components basically installed – a Julian job, it was time for Colin – the plumber/electrician to get the system ready for ‘flipping the switch’ and operating.

Step one … make a big mess of the boat 
hacking big holes in the boat (again) 
One of the pumps – the first of two. 
See that small hole looking out at the green water … Yes, you want to make sure you get that right. 
Not a simple task … putting the fresh water feed into the big ol’ stainless steel tank 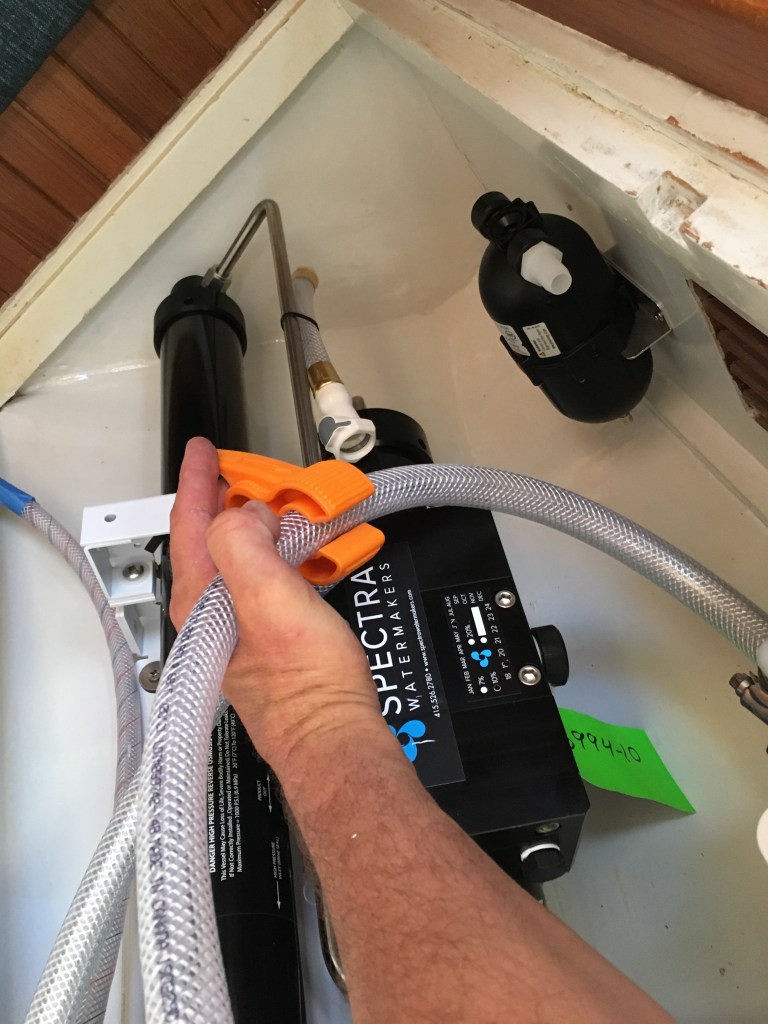
Plumbing 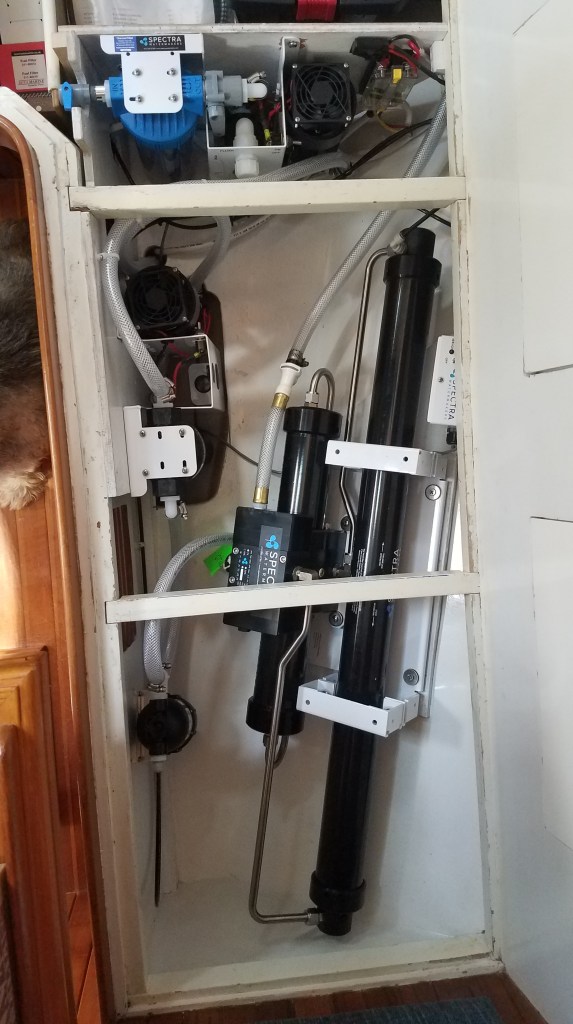
The install pretty much complete 
The Spectra flow and pressure gauge installed 
Should have read the instructions better .. a false start with the no carbon filter installed – corrected quickly. 
There were the usual minor adjustments (forgetting to install the carbon filter and wondering why the post- watermaking flush was not doing what it should), but it now appears to WORK LIKE A DREAM!
It is indeed satisfying to see the culmination of a couple of projects come together. In this case, being able to make water at 15 gallons per hour, entirely from energy created by the solar panels, with no draw on the batteries. We’re feeling a bit ‘off the grid’, and ready for tie-dyed t-shirts.
